Black beans (also known under many names such as Tampico beans, turtle beans, or Mexican black beans) refer to a small and tasty type of beans which owns high nutritional value. The care and cultivation of these beans are also easy for even beginners to perform. With the following detailed guide, you can master how to grow black beans in your garden in no time.
Guide to Growing Black Beans
Select a Suitable Place for Growing Beans
Select a spot with lots of sunlight. As black beans need sunlight to grow, make sure you pick out a plot which will get the daily sun to the full extent. Ideally, you should make sure your beans receive at least 6 hours of sunlight each day. This is considered the first and important step when you learn and practice how to grow black beans.
Check the soil’s pH level and improve the condition of your soil. Your black beans will grow healthily in soil with a pH from 6.0 to 6.5. Check out a soil sample for testing, or get a home test kit of pH.
Add certain low-nitrogen fertilizer to the soil. Generally, do not use too much fertilizer for your bean plants. Still, if you’ve ever used the same plot for growing other types of plants, enriching the soil’s texture with some organic fertilizer before starting to plant may be a good idea. Pick out a fertilizer that contains a low-nitrogen level to ensure the bean’s highest yield.
Plant Black Beans
When you have finished preparing a location for your beans, move on to this part as how to grow black beans.
Purchase dry seeds
You have many options to choose, from online shops, a garden center to your local plant store. Remember to look for the seeds with the name “black turtle beans.”
Sow the seeds at the end of the spring season
Warm weather is an ideal environment for black beans to sprout. It’s advisable to have your beans planted when the spring is soon coming to an end – for example, in May, as they can make the most use from the warm temperature of the summer. Also, make sure to maintain your soil’s temperature no less than 60 °F (16 °C) for the seed-planting process.
Put the black beans in water for a few hours beforehand
This step will result in your seeds growing much faster, even better if they are drenched in water overnight. Remember to use the clean water for soaking the beans before planting.
Inoculate the beans or soil
Applying a legume inoculant either directly to the beans or to the soil is an effective method to make better use of nitrogen from the soil. Look online or pay a visit to some local stores for the inoculant that is specially created for beans.
Plant your beans 2.5 cm (1 inch) deep and keep them 10-15 cm apart from each other(4-6 inches)
This step on growing black beans is optional. Still, keep an appropriate distance between the beans. That way, they can spread out when reaching a certain height. Afterward, apply a thin layer of soil on your beans after planting.
Water the beans after you plant them
When you moisten the soil at the time of planting, your beans will be encouraged to germinate. After planting, gently spray water on the beans to avoid the soil getting too damp. Don’t forget that the moist soil is the best condition for your beans to grow.
Care for Bean Plants
Water the plants if you notice their lifeless and withered look in the morning. In that case, you should do so though they are hardy types which don’t require plenty of water. Also, water your beans if you feel the soil is getting drier.
Put mulch around your plants’ bases. With mulch, weeds can be kept at bay. It also helps retain the moisture of soil, and keep it warm. Go for a mulching material made from 100% organic – for instance, hay or chopped straw.
Consider tieing your plants to a pole or trellis, if needed. Take note of this step if you learn how to grow black beans belonging to a vining kind. These poles or trellis will act as a type of support for the plant. Put a trellis or pole right beside each plant to assist their growth.
Be careful not to damage the roots during the weeding process. As the roots of black beans are shallow, you should be cautious when treating the weeds near the plants.
Protect the beans from aphids with the use of pesticides or non-chemical methods. Your plants are likely to be harmed by aphids and other types of pests, so use a garden hose to get rid of pests or chase them away with your hands.
Harvest and Store Your Black Beans
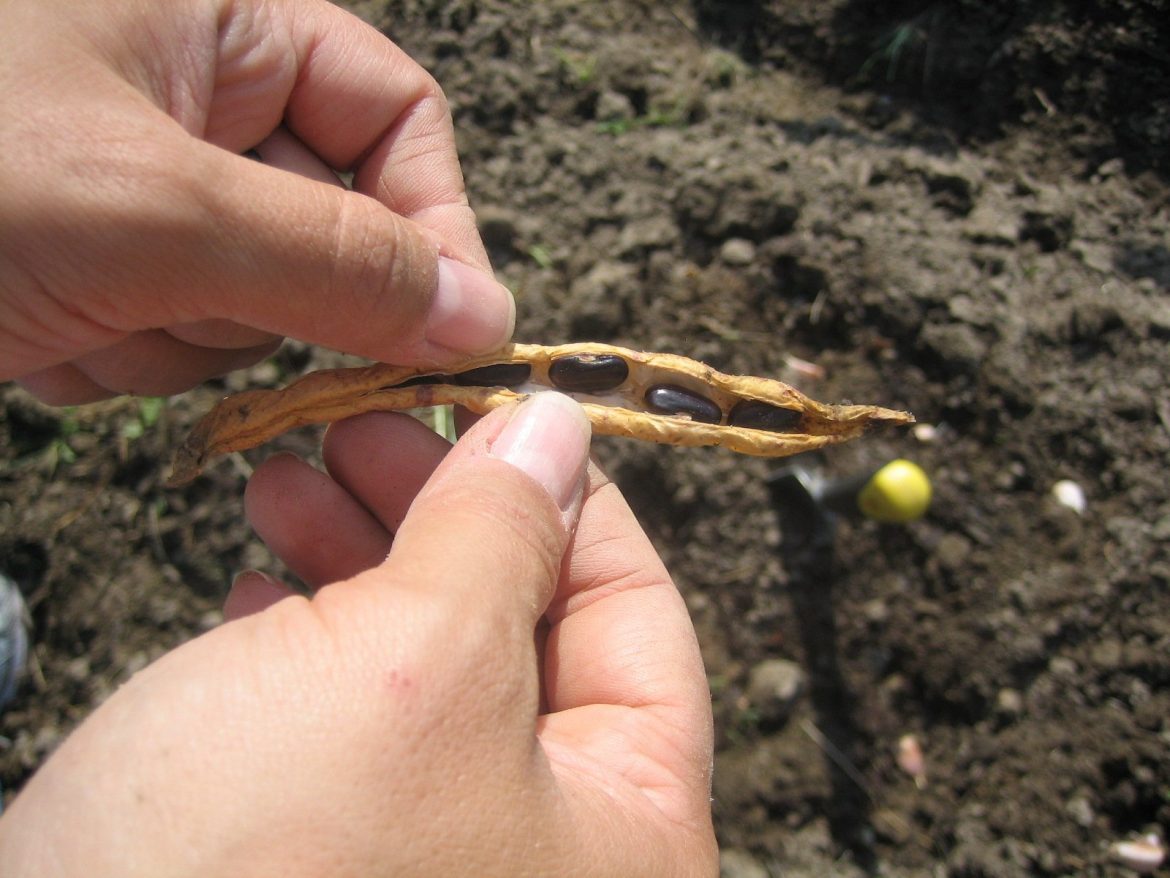
Harvest your plants when seeing the pods turning yellow and feeling dry. You’re coming near to the final steps on how to grow black beans. The yellow, dry, and hard beans are the signal for you to harvest the pods.
Cut the pods that are mature off of the plant. Snip off any mature pods with a small pruner or a pair of scissors if noticing any signals of dry and yellow features. Don’t know whether the pot is ready for harvest or not? Open one and look at the inside of the beans. If they have black color and dry look, it means your beans are mature enough.
Take the beans out of the pods and allow them to be dry. Collect the beans inside the shells once you’ve harvested them. Dry the beans under the sun for a day or so before putting in your storage.
Final Words
Hope you enjoyed learning how to grow black beans with our simple step-by-step instruction! As always, if you have any related questions, leave them in the comment section below.


